This blog post provides a step-by-step guide to configuring Alloy authentication using SAML and Cloudflare as your Identity Provider (IdP). The configuration process is divided into two parts: setting up Cloudflare and configuring Alloy.
Part 1: Configuring Cloudflare
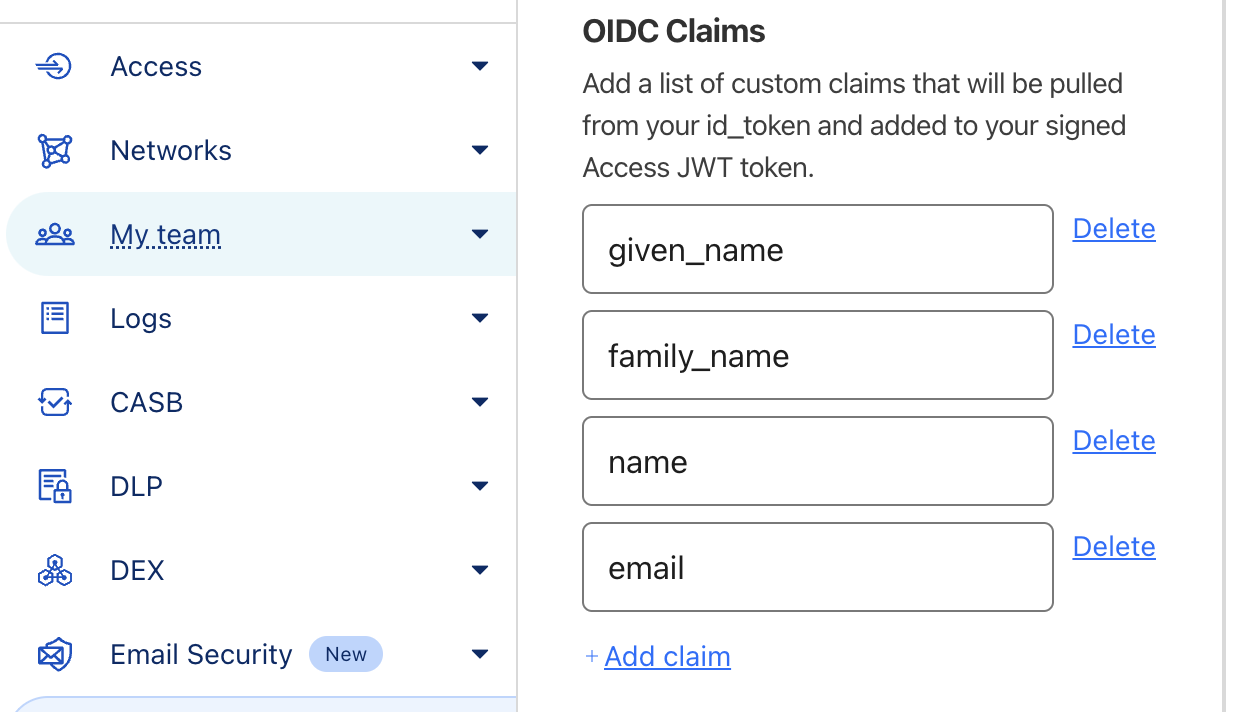
First, ensure you've added the necessary claims in Cloudflare Authentication. Since our authentication method is Google Workspace, select the appropriate authentication method you've enabled in Cloudflare. Add the following OpenID Connect (OIDC) claims:
SAML Attributes Configuration in Cloudflare
- given_name (treated as First Name in Alloy)
- family_name (treated as Last Name in Alloy)
- name (treated as Full Name in Alloy)
When tested below result should be visible in Cloudflare:
{
    "name": "firstname lastname",
    "email": "[email protected]",
    "Oidc_fields" : {
        "given_name": "firstname",
        "family_name": "lastname",
        "name": "firstname lastname",
        "email": "[email protected]"
    }
}
Next, configure the SAML application in Cloudflare Zero Trust:
- Open Cloudflare Zero Trust and navigate to Access → Applications.
- Click Add an Application.
- Select SAAS as the application type.
- Choose a descriptive Application Name.
- Enter AlloyIAV as the Entity ID.
- Enter https://app.alloy.co/sso/saml/?acs as the Assertion Consumer Service (ACS) URL.
- Set the Name ID Format to Email.
- Configure the SAML Attribute Statement as needed which is shown as below
- Copy the SAML Metadata Endpoint URL and paste it into your browser's address bar. This will display the metadata required for Alloy's SAML configuration.
- Press Ctrl+S (or Cmd+S on macOS) to save the metadata as an XML file. This file will be used in the Alloy configuration.
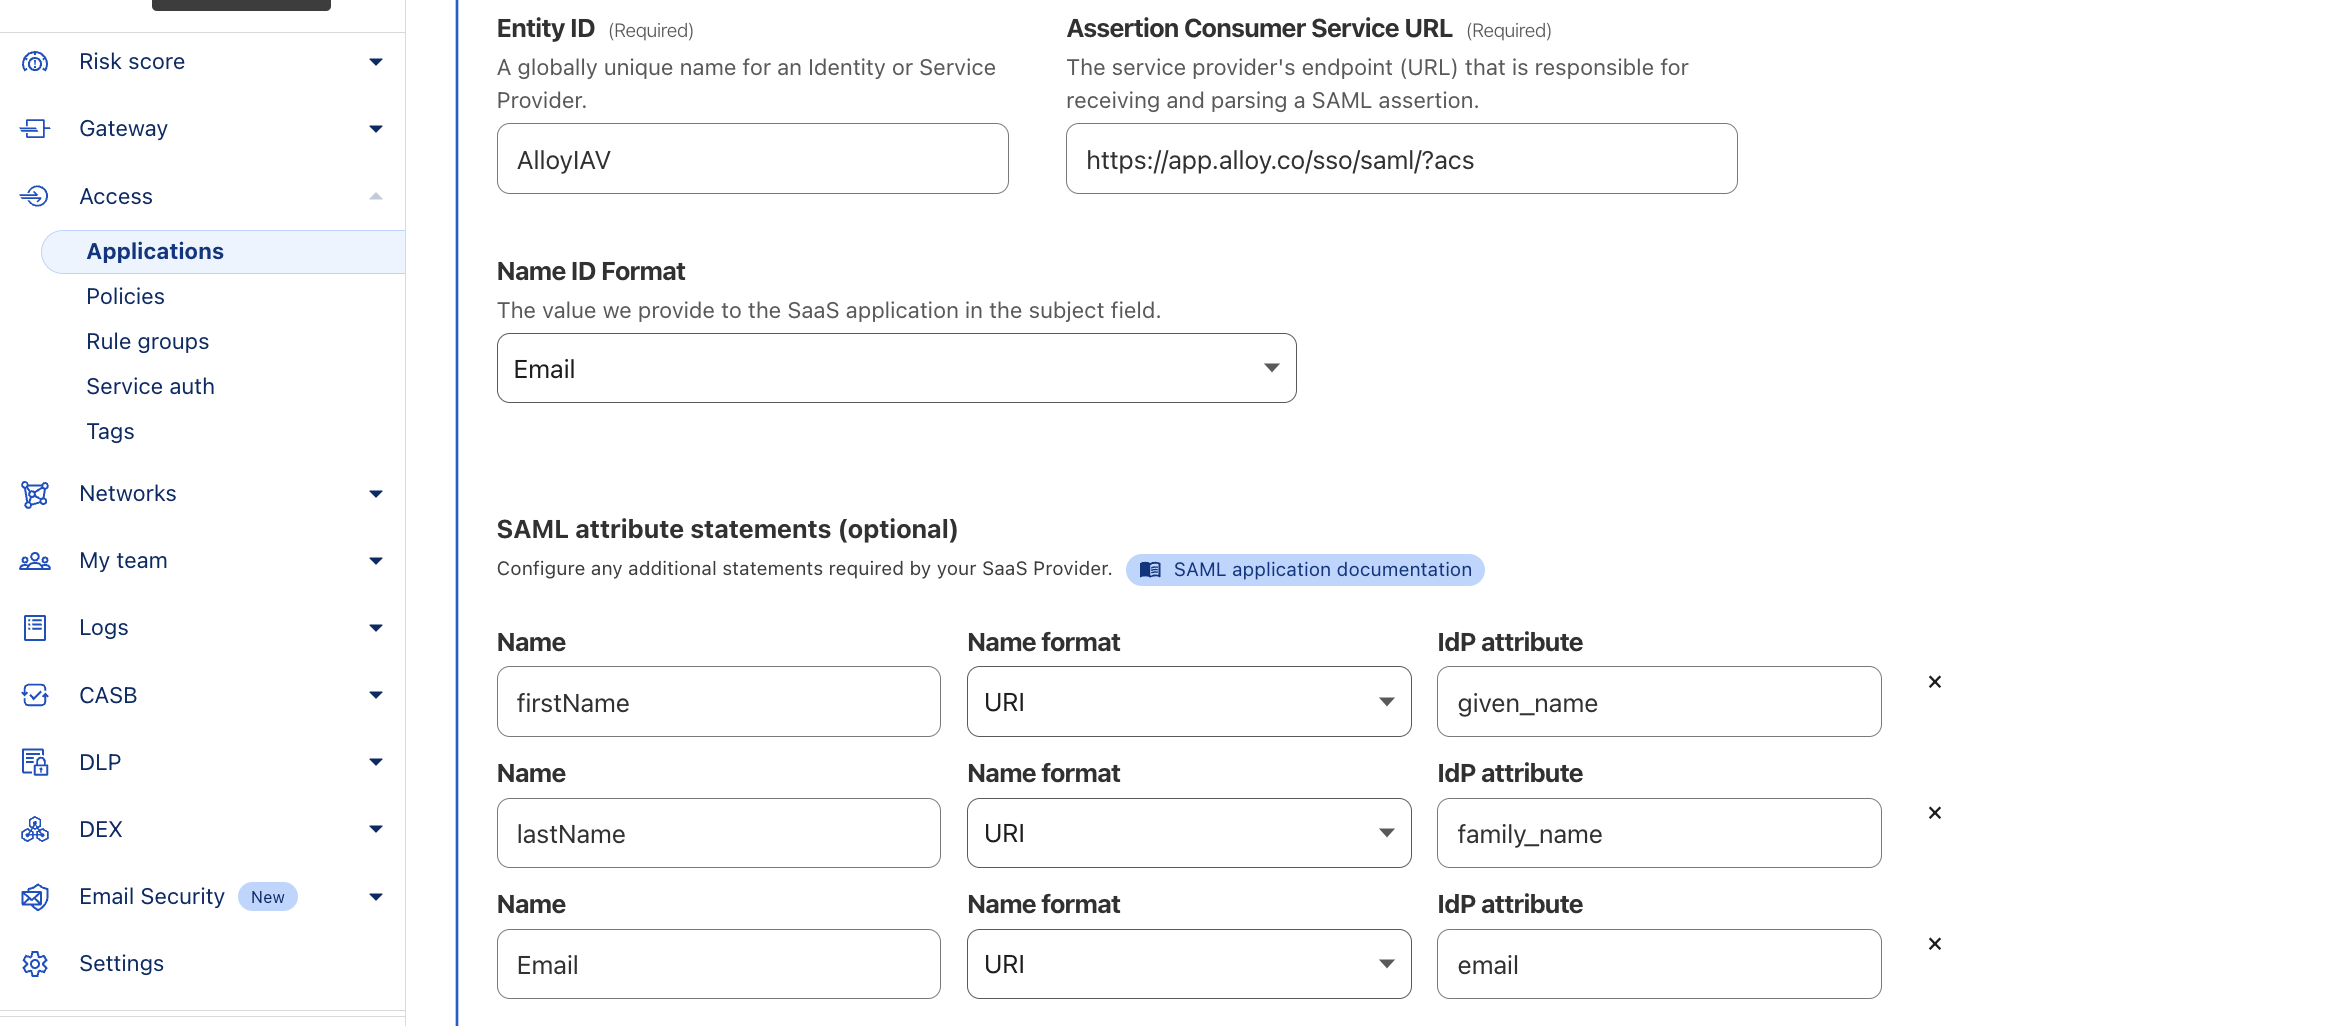
SAML Attributes Configuration in Cloudflare
Part 2: Configuring Alloy
Now, let's configure Alloy to use Cloudflare as your IdP:
- In Alloy, navigate to Settings.
- Edit Other Configuration and enable Enforce Single Sign-On.
- Edit Auth Configuration.
- In Select Your IDP, choose My IDP is not Listed.
- Select the relevant environment (Production or Sandbox). Ensure the SSO URL and Audience URL match the values configured in Cloudflare Zero Trust. Click Continue.
- Alloy will prompt you to upload the XML metadata file. Browse and upload the metadata file you downloaded in step 10 of the Cloudflare configuration.
- Once the file is uploaded, select Enable SAML.
After completing these steps, you should be able to log in to Alloy using SAML through Cloudflare. You can verify successful authentication by checking the logs in Cloudflare.